Beekeeping for beginners sounds simple from the outside: buy a hive, order some bees, set it in the yard, wait for honey. The reality is messier. Bees are livestock — they need timing, the right equipment, regular observation, real pest management, and a beekeeper who stays curious instead of panicking the first time the hive sounds louder than usual.
We run a beekeeping supply shop here in Cache Valley, and over the years the pattern is clear: the new beekeepers who do well aren't the ones with the biggest budget or the most gear — they're the ones who got the fundamentals right and paid attention through a full season. You don't need a farm or years of experience. You need a solid setup, a realistic first-year plan, and the discipline to focus on basics before you chase advanced tricks. What's below covers those basics in order.
Brand new? Start at the top and work straight through. Already ordered bees? Skip to equipment, first-year timing, and Varroa management.
Why people start beekeeping
Most new beekeepers start for one of four reasons: they want fresh honey, they want better pollination for a garden or orchard, they are fascinated by the biology of honey bees, or they simply want a practical hobby that gets them outside. All of those are valid. The key is understanding that bees are not passive pets. They respond to weather, forage, disease pressure, queen performance, and your management decisions.
That is also why beginner education matters so much. A hive can look busy and healthy right up until the moment something starts going wrong. Strong beekeeping habits let you spot those changes early. If you start with realistic expectations, you will enjoy the process more and make fewer expensive mistakes.
What you need to start beekeeping
Most beginners do best when they keep the equipment list simple and standard. There are endless gadgets in the beekeeping world. Ignore most of them for now. Your first hive needs reliable basics, not novelty.
The hive
A standard 10-frame Langstroth hive is the default beginner recommendation for a reason. It is widely supported, replacement parts are easy to find, and most local classes, clubs, and YouTube demonstrations assume this style of equipment. A starter setup usually includes a bottom board, two deep brood boxes, frames, foundation, an inner cover, and an outer cover. If you want the fastest route, start with a hive kit. If you prefer to build piece by piece, browse hive components.
Protective gear
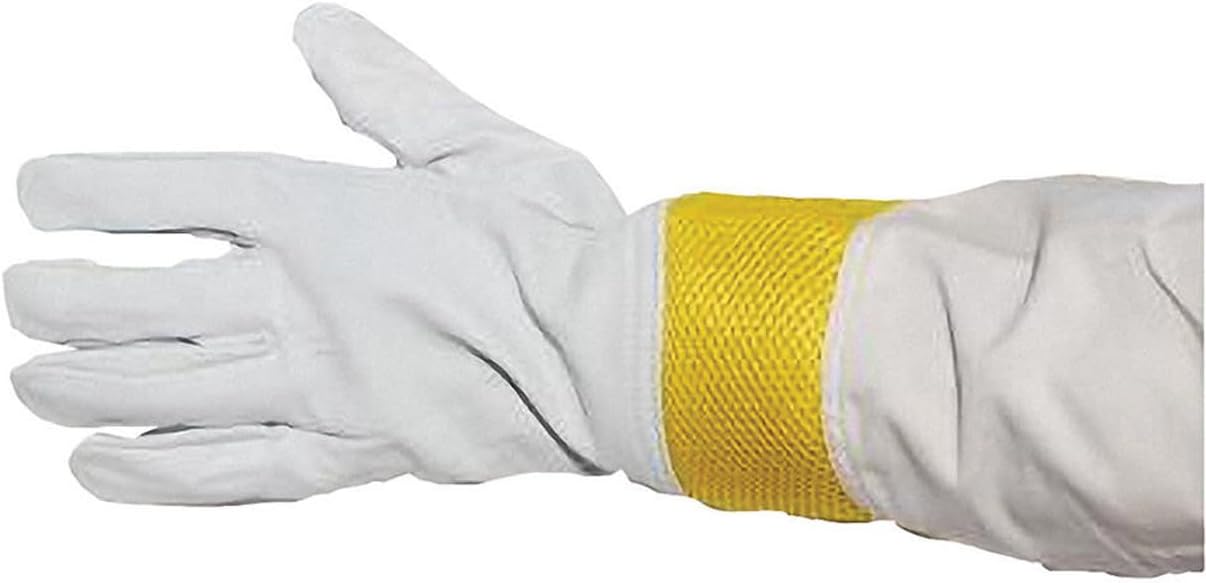
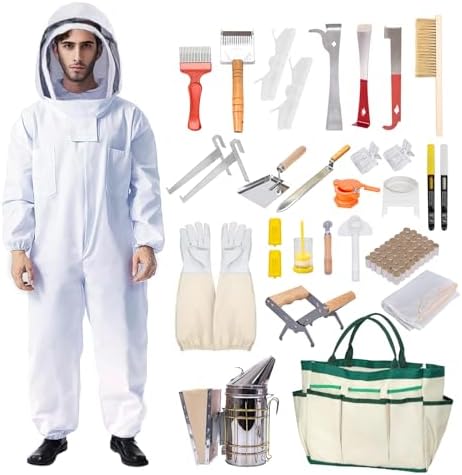
A bee jacket or suit, a veil, and gloves are worth the money. Beginners learn faster when they aren't bracing for every sting. Real protection lets you move slowly, watch bee behavior, and finish an inspection instead of bailing halfway through. Most beginners should start with our protective clothing section for wearable gear.
Basic tools
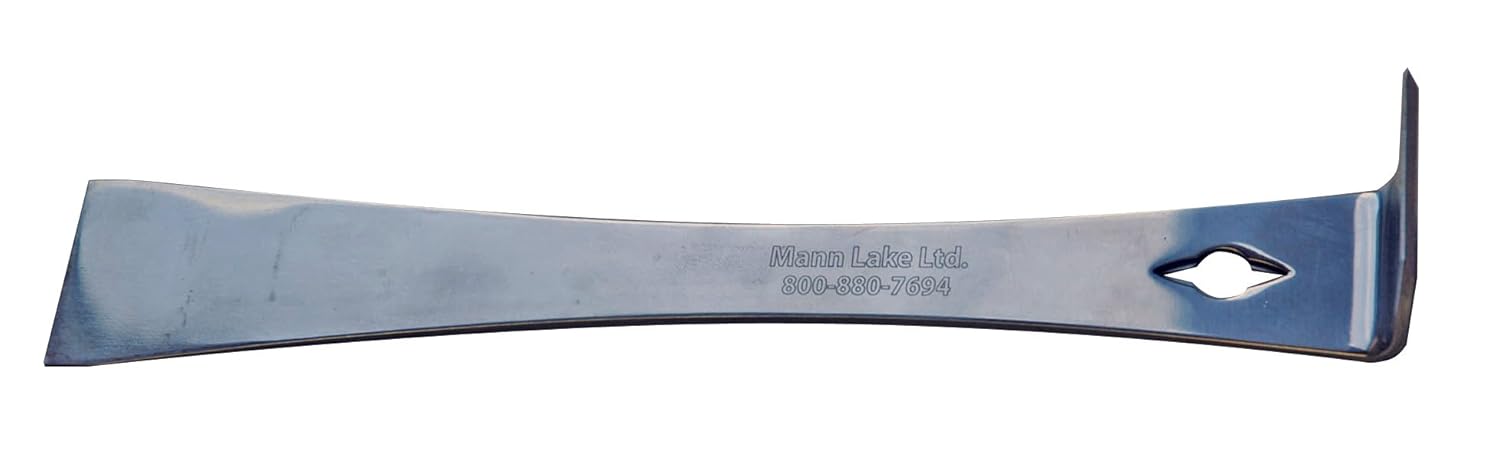
You will use a hive tool every inspection. A smoker is almost as essential. A bee brush, feeder, and a few spare entrance reducers or straps are also useful from the start. These are not glamorous purchases, but they are the items that make routine hive work feel manageable. Check tools and accessories if you are still building out your starter kit.
Bees
You need actual bees, of course, and beginners usually choose between a package and a nuc. A package is a box of loose bees plus a caged queen. A nuc is a small established colony on frames with brood, food stores, and a laying queen. If available, a nuc is usually the easier beginner option because it already functions as a colony. For a direct comparison, read Package Bees vs. Nucs.
A plan for feeding and mite management
New colonies often need feeding support. Every colony needs mite management. Do not treat these as optional extras. Feeding helps a package or weak colony build comb and brood. Varroa monitoring and treatment protect the long-term survival of the hive. If you have not already, spend time in the bee health section and read our Varroa treatment guide.
Where to place your first hive
Hive placement has a surprisingly large effect on how easy your first season feels. You want a location with morning sun, decent airflow, dry footing, and as little daily disturbance as possible. A little afternoon shade can help in hotter climates, but too much deep shade keeps a hive damp and slow in spring.
Also think about flight paths. Bees launch and land in front of the entrance. You do not want that line aimed through a patio, play area, dog run, or main walking path. A simple fence or hedge can help lift the flight path upward if space is tight.
For northern Utah and Cache Valley specifically, placement also needs to account for wind and winter exposure. Our valley gets real north wind. A fence, shed, or tree line on the north side of the hive can make winter survival easier. If you live in Cache Valley, the best local starting point is How to Start Beekeeping in Cache Valley, Utah.
Package bees or a nuc?
This is one of the first big beginner decisions. Both can work. They are not equal in difficulty.
Why packages appeal to beginners
Packages are widely available, often less expensive up front, and easy to order early in the season. Installing them can be exciting because you see the colony build from the very beginning. The downside is that packages start from zero. The queen must be accepted, comb has to be built, brood has to be raised, and the colony needs enough time to ramp up before summer and eventually winter.
Why nucs are usually easier
Nucs already contain brood in different stages, stored food, workers that are operating as a colony, and a queen that is already laying. That head start matters a lot in short-season climates. If you can get a healthy nuc from a reputable source, it is often the more forgiving path for beginners. For the full tradeoff breakdown, again, our package vs. nuc guide is worth reading before you order.
Your first-year beekeeping timeline
Beginners do best when they think in seasons instead of random inspections. The questions you ask in January are different from the ones that matter in September. Here is the simplest way to frame the year.
See the full first-year timeline if you want the expanded month-by-month version with beginner checklists, seasonal priorities, and linked gear recommendations.
Late winter: learn and order early
Late winter is when beginners should read, order bees, assemble equipment, and make local contacts. If you wait until spring is already in motion, you will feel behind from day one. This is also a good time to line up classes and club meetings. Our classes page is a good place to start, along with local beekeeper associations.
Spring: install bees and build momentum
Spring is the main launch window. Install your package or nuc, feed if needed, and learn how to perform calm, consistent inspections. If you are installing a package, read How to Install Package Bees before your bees arrive. Once the colony is established, spring inspections become your rhythm-setting habit. Our spring inspection checklist covers what to look for.
Early summer: watch growth and space
As a colony expands, you start watching for brood pattern quality, food stores, queen performance, swarm pressure, and whether the hive needs more room. This is when beginners learn the art of not waiting too long to add space. If the colony gets crowded and congested, swarm risk rises. Read Swarm Prevention Techniques before that happens, not after.
Mid to late summer: forage, honey, and mite pressure
Summer can be productive, but it is also the season when hidden problems can build. Nectar flow changes. Heat and dry conditions affect behavior. Varroa populations continue climbing. To better understand local blooms and nectar timing, read our Cache Valley forage guide. If you are lucky enough to get surplus honey, our honey harvest guide explains the basics without turning extraction into a chaotic mess.
Late summer and fall: prepare for winter
This is where a lot of beginner colonies are won or lost. Strong winter bees are raised in late summer and early fall. If mites are high during that window, those bees come out compromised. That is why late summer monitoring and treatment are so important. Follow our Varroa guide and, if you are in colder country, read How to Winterize a Beehive in Northern Utah before temperatures crash.
What to look for during inspections
New beekeepers often assume an inspection means checking every frame every time. It does not. The point of an inspection is to answer a few useful questions:
- Is the queen present or, at minimum, is there fresh evidence she is laying?
- Is brood present in a solid, healthy-looking pattern?
- Does the colony have enough food and space?
- Are there signs of swarm preparation?
- Are there any obvious red flags like pests, disease signs, or queenlessness?
That mindset keeps you from turning inspections into endless frame shuffling. Move slowly, use smoke lightly, and focus on pattern recognition. Over time, you will stop seeing a hive as chaos and start seeing it as a set of signals.
Varroa mites: the beginner topic you cannot skip
If there is one section in this guide you should take seriously, it is this one. Varroa destructor mites are the biggest killer of managed honey bee colonies. Beginners often lose hives because everything looks fine until it suddenly does not. By then, the damage may already be done.
Varroa mites reproduce in brood cells and weaken bees directly while also spreading viruses. A colony can still look active while mite pressure quietly climbs. That is why "my bees seem busy" is not a mite management plan.
Your basic beginner rule is simple: monitor, do not guess. Use established counting methods, learn the thresholds recommended in your region, and treat when necessary. This is not about being alarmist. It is basic livestock management. Our Varroa treatment guide covers the practical steps in more detail.
Common beginner beekeeping mistakes
Almost every first-year beekeeper makes a few of these. The trick is avoiding the ones that are truly expensive.
Starting too late
Ordering bees late, assembling equipment late, or trying to learn everything after the bees arrive puts you under constant pressure. The solution is boring but effective: order early, read early, and prepare the hive before delivery day.
Buying random equipment that does not match
Mixing odd sizes, styles, or low-quality components creates endless little frustrations. Stick to standard Langstroth gear unless you know exactly why you are choosing something else.
Opening the hive too often
Some beginners inspect daily because they are excited or anxious. Bees need some peace. Inspect with a purpose, not just because you are curious. In the active season, weekly or biweekly checks are usually enough for most new beekeepers.
Ignoring swarm pressure
A booming spring colony can flip from impressive to swarm-ready quickly. Learn the early cues and read our swarm prevention guide before you need it.
Underestimating winter
Many new beekeepers think honey harvest is the finish line. It is not. Healthy bees, good food stores, and low mite pressure going into fall matter more. If you are in a colder climate, especially in northern Utah, winter prep is part of your core season plan, not a side task.
Will you get honey in your first year?
Maybe. But it should not be the benchmark you judge yourself by. A package colony often spends much of its energy building comb and raising brood. A strong nuc may give you a better shot at surplus, especially in a good season, but beginner success is still better measured by colony health than by honey volume.
If you do harvest honey, learn the process before you improvise. Our how to harvest honey guide covers the basics and helps you avoid the classic beginner move of pulling frames too early or making a sticky disaster in the kitchen.
Local resources make beginners better faster
One of the smartest things a beginner can do is connect with local beekeepers. Local clubs, mentors, classes, and region-specific guides shorten the learning curve dramatically. They also help you calibrate what is normal in your area. Bloom timing, winter prep, swarm season, and treatment timing all shift with climate and elevation.
If you are in northern Utah, keep reading through local pages like Logan, Hyrum, Smithfield, and Preston, plus our region-specific content like starting beekeeping in Cache Valley and winterizing in northern Utah. Local context is not a nice extra. It changes decisions.
A practical beginner shopping list
If you want a clean, no-drama first order, here is the list most beginners should work from:
- Hive kit or equivalent brood boxes, frames, and covers
- Bee jacket or suit, veil, and gloves
- Hive tool, smoker, bee brush, and feeder
- Bee health and mite management supplies
- Plan for packages or nucs and installation timing
That is enough to start well. You can add honey supers, extraction gear, and more specialized equipment later as the colony grows and your confidence does too.
Or grab a ready-made kit
We have starter kits that bundle the essentials into one-click Amazon checkout. Pick the tier that fits your budget:
Beginner Basic Starter Kit
The bare essentials to get your first hive set up and inspect safely. A solid budget-friendly starting point.
Brand-new beekeepers who want to start one hive without overspending on extras they may not use yet.
Keeps the first setup simple so you can get bees installed fast during Cache Valley's short spring buildup window.
Buying a random bargain bundle that still leaves you missing a smoker, gloves, or feeder on install day.
What's included (6 items)
- Basic Hive Kit
- Bee Jacket
- Goatskin Leather Gloves
- Hive Tool
- Smoker
- Entrance Feeder
Beginner Complete First-Year Kit
Everything you need for a confident first year of beekeeping, including room to expand when your colony grows.
First-year beekeepers who want one confident purchase with enough room to grow through spring and summer.
Adds feeding and expansion gear that matters when colonies explode during Cache Valley's brief nectar flow.
Getting caught under-equipped when the colony fills the first brood box faster than expected.
What's included (11 items)
- Brood Kit (2 Deep Supers + 20 Frames)
- Bee Jacket
- Goatskin Leather Gloves
- Hive Tool
- Smoker
- Smoker Fuel
- Bee Brush
- Top Hive Feeder
- Entrance Reducer
- Honey Super Kit (Medium)
- Beekeeping for Dummies
Your next steps as a beginner beekeeper
If you are serious about starting, here is the best next-step sequence:
- Read this guide once all the way through.
- Order bees early and decide whether you are starting with a package or nuc.
- Assemble your hive before the bees arrive.
- Gather protective gear and core tools.
- Learn your spring inspection routine.
- Make a real Varroa management plan.
- Connect with local resources so you are not learning in isolation.
That is the path. Beginner beekeeping is not about memorizing every possible problem up front. It is about getting the fundamentals right, paying attention, and improving one season at a time.
Keep reading
This pillar guide is meant to get you oriented. These guides help with the specific next steps beginners usually need:
- How to Start Beekeeping in Cache Valley, Utah
- Package Bees vs. Nucs
- How to Install Package Bees
- Spring Inspection Checklist
- Swarm Prevention Techniques
- Cache Valley Bee Forage Guide
- Varroa Treatment Guide
- How to Harvest Honey
- How to Winterize a Beehive in Northern Utah
- How to Catch a Bee Swarm
- Best Beekeeping Starter Kit
And if you are ready to shop, start with hive kits, hive components, protective clothing, and bee health supplies.